Execute a Recurring Job in Microsoft Dynamics 365 with Azure Scheduler

The requirement for recurring job execution is quite common in Microsoft Dynamics implementations. Here are some of the business requirements I have encountered:

  • Send monthly newsletter to target customers
  • Synchronize MSCRM Users details with Active Directory once a day
  • Once a month, disqualify all leads that have no open activities
  • Once every hour, export Appointments from mail server and import into Dynamics 365

Microsoft Dynamics 365 has no reliable built in scheduling mechanism that can be leveraged for custom solutions. The Asynchronous Batch Process Pattern I have written about in the past can be used with daily recurring jobs but when it comes to hours resolution and less, it becomes unsteady.

Azure Scheduler is a reliable service that can run jobs in or out of Azure on a predefined schedule, multiple times or just once. So why not harness this mechanism to schedule Microsoft Dynamics 365 recurring jobs?

In this post, I’ll demonstrate how to use Azure Scheduler to execute a recurring job in Microsoft Dynamics 365.

Sample business requirement

Each day, automatically email a birthday greeting to contacts whose birthday occurs on that same day.

Implementation Details

Here are the solution main components:

  1. Custom Action dyn_SendBirthdayGreetings: activates a Custom Workflow Activity SendBirthdayGreeting which Retrieve all relevant Contact records by birthdate, creates and sends an email for each contact record.
  2. Azure Function BirthdayGreetingsFunction: invokes the dyn_SendBirthdayGreetings Custom Action via Microsoft Dynamics 365 API.
  3. Azure Scheduler BirthdayGreetingsSchduler: set to execute once a day at 9:00 for unlimited occurrences and invokes the BirthdayGreetingsFunction Azure Function

Architectural Notes

Why using Custom Action? Although it is possible to manage the required business logic in Azure Function, Dynamics related business logic should reside within Dynamics, managed and packaged in a Solution. This way, the Scheduling and Executing components are kept agnostic and isolated as possible and therefore easily maintained.
Having said that, you should be aware of the Sandbox Execution Timeout Limitation and consider using Custom Workflow Activity after assessing the business logic at hand.

Implementation Steps:

  1. Define dyn_SendBirthdayGreetings Custom Action

    Download, import and publish the unmanaged BirthdayGreetingAutomationSample_1_0_0_0 solution.
    It contains a Custom Action called dyn_sendBirthdayGreeting which will be later called from the BirthdayGreetingsFunction Azure Function.
    By default, the Custom Action will create a birthday greeting email but will not send it. To change this, disable the Custom Workflow Activity, edit the only step and change the Send greeting email after creation? property value to true. Note that this may actually send email to your contacts.
    The SendBirthdayGreeting Custom Workflow Activity code can be found here.

  2. Define BirthdayGreetingsFunction Azure Function

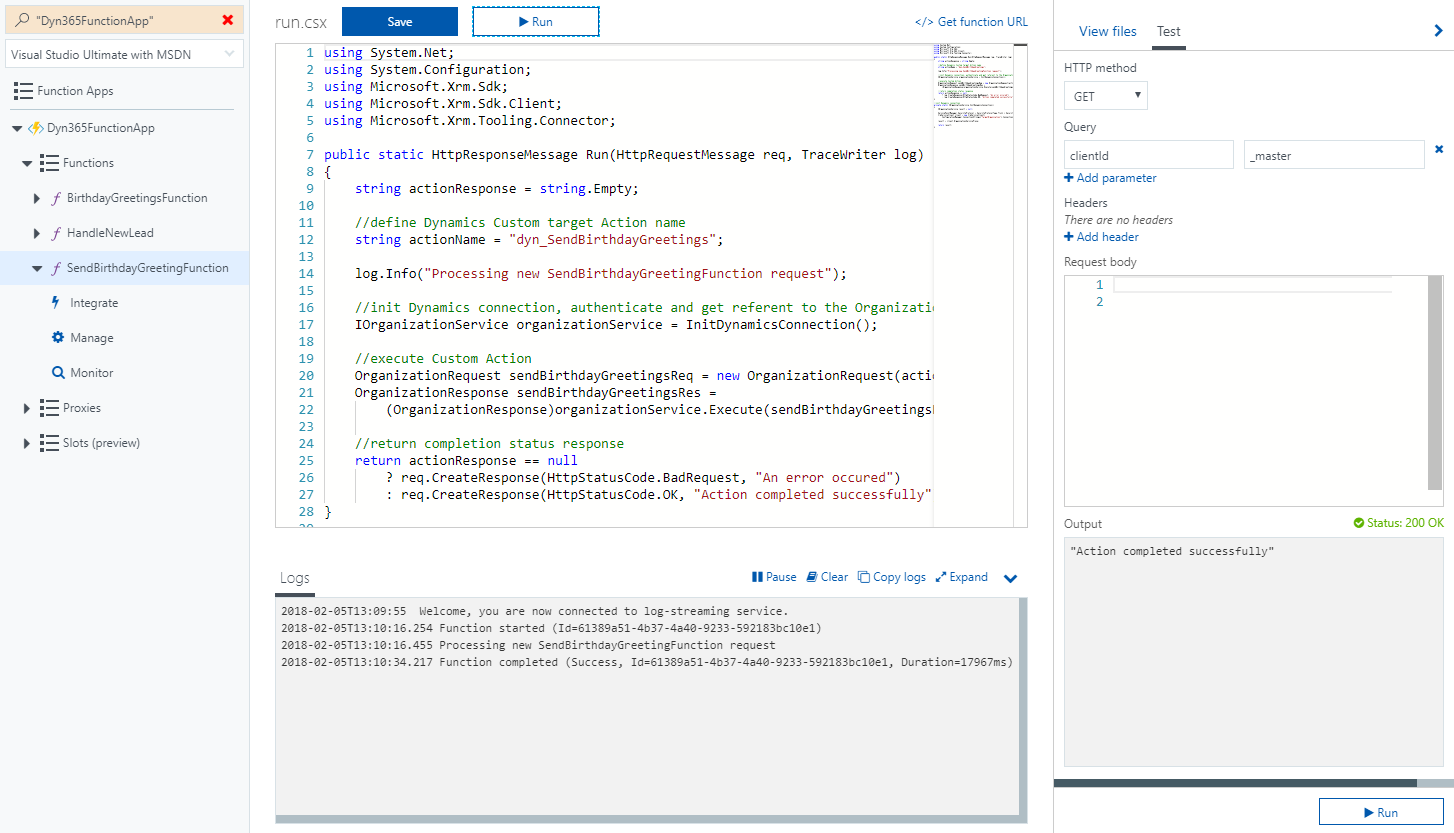
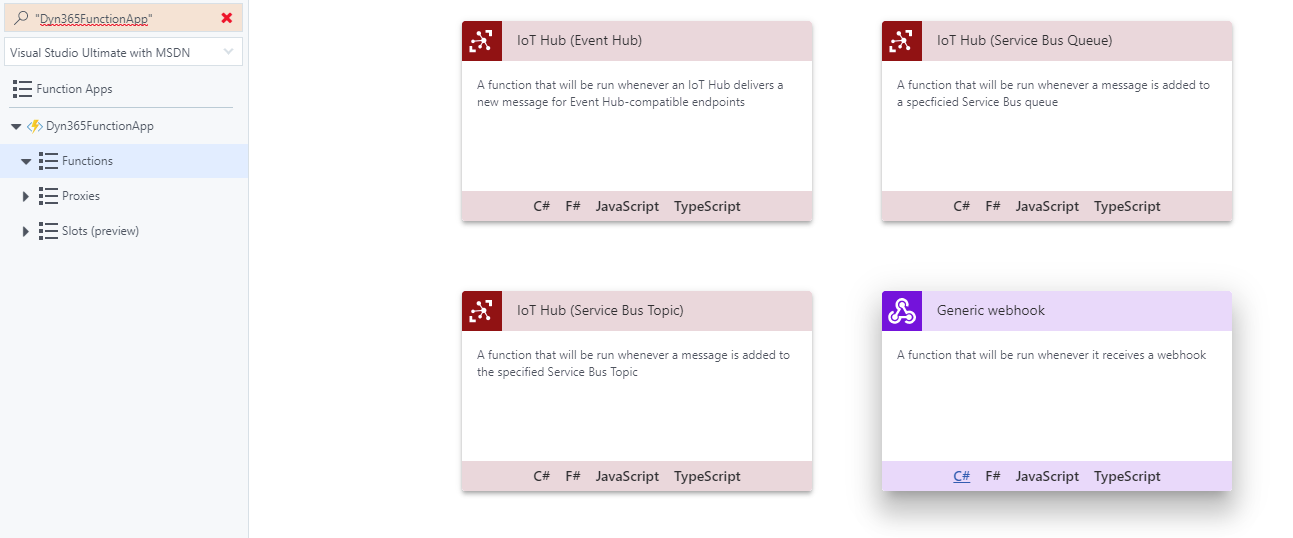
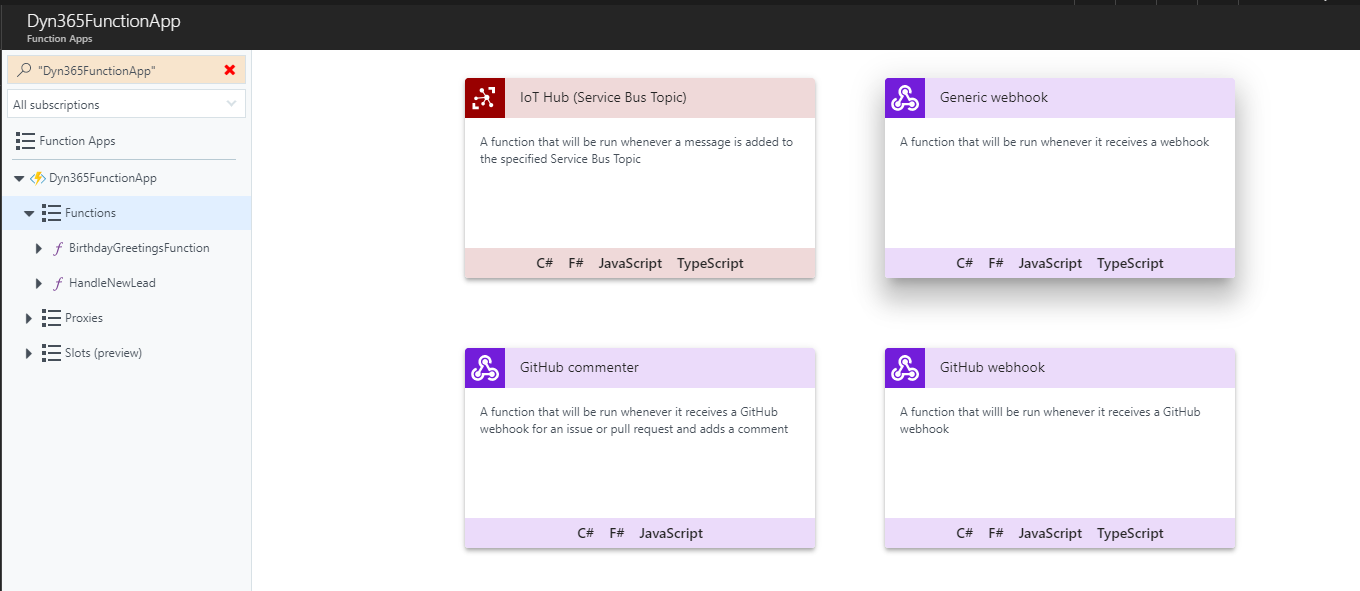
    After creating a Function App (follow the first 3 steps here), create a new C# Function of type Generic webhook under your Function App functions collection, name it SendBirthdayGreetingFunction

    Create a new Function of type Generic webhook under your Function App collection, name it SendBirthdayGreetingFunction

    name it SendBirthdayGreetingFunction
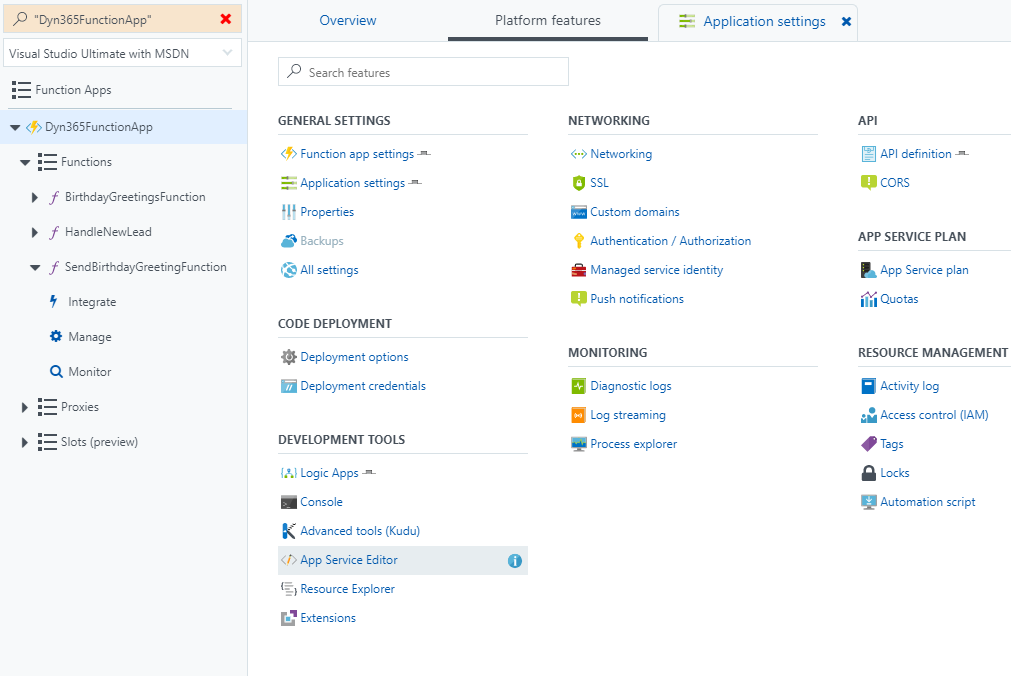
    Click the App Service Editor option in the Application Settings tab

    Click the App Service Editor option in the Application Settings tab

    Add a new file under your Function root, name it project.json. Copy the following JSON snippet into the text editor

    Add a new file under your Function root, name it project.json. Copy the following JSON snippet into the text editor

    {
    	"frameworks": 
    	{
    		"net46":
    		{
    			"dependencies": 
    			{
    				"Microsoft.CrmSdk.CoreAssemblies": "9.0.0.7",
    				"Microsoft.CrmSdk.XrmTooling.CoreAssembly": "9.0.0.7"
    			}
    		}
    	}
    }
    

    Close the App Service Editor to get back to your function. Selecting your Function App, click the Application settings tab.

    Close the App Service Editor to get back to your function. Selecting your Function App, click the Application settings tab

    Scroll down to the Connection strings area and add a new Connection string named TargetOrganization. This will be used to connect and authenticate to your Microsoft Dynamics 365 Organization.
    For the connection string value, set your organization details in the following format:

    AuthType=Office365;Username=XXX@ORGNAME.onmicrosoft.com;Password=PASSWORD;Url=https://ORGNAME.crm.dynamics.com

    Note the data center targeted, crm.dynamics.com is targeting an organization in North America data center.

    Click Save to save the newly created Connection String.

    Scroll down to the Connection strings area and add a new Connection string named TargetOrganization
    Navigate back to your SendBirthdayGreetingFunction function and  replace the default Function code with the following code snippet.
    Note that code is executing a Custom Action named dyn_SendBIrthdayGreetings.It also uses the TargetOrganization connection string when accessing Microsoft Dynamics 365 API.

    using System.Net;
    using System.Configuration;
    using Microsoft.Xrm.Sdk;
    using Microsoft.Xrm.Sdk.Client;
    using Microsoft.Xrm.Tooling.Connector;
    
    public static HttpResponseMessage Run(HttpRequestMessage req, TraceWriter log)
    {
        string actionResponse = string.Empty;
    
        //define Dynamics Custom target Action name 
        string actionName = "dyn_SendBirthdayGreetings";
    
        log.Info("Processing new SendBirthdayGreetingFunction request");
    
        //init Dynamics connection, authenticate and get referent to the Organization Service
        IOrganizationService organizationService = InitDynamicsConnection();
    
        //execute Custom Action  
        OrganizationRequest sendBirthdayGreetingsReq = new OrganizationRequest(actionName);
        OrganizationResponse sendBirthdayGreetingsRes = 
            (OrganizationResponse)organizationService.Execute(sendBirthdayGreetingsReq);
    
        //return completion status response 
        return actionResponse == null
            ? req.CreateResponse(HttpStatusCode.BadRequest, "An error occured")
            : req.CreateResponse(HttpStatusCode.OK, "Action completed successfully");
    }
    
    //init Dynamics connection
    private static IOrganizationService InitDynamicsConnection()
    {
        IOrganizationService result = null;
    
        ServicePointManager.SecurityProtocol = SecurityProtocolType.Tls11 | SecurityProtocolType.Tls12;
        CrmServiceClient client = new CrmServiceClient(
            ConfigurationManager.ConnectionStrings["TargetOrganization"].ConnectionString);
    
        result = client.OrganizationServiceProxy;
    
        return result;
    }
    

    Navigate to the Function Integrate area and set the Mode to standard. This will enable the consumption of the function using HTTP GET method.

    Navigate to the Function Integrate area and set the Mode to standard. This will enable the consumption of the function using HTTP GET method

    Back at your Function code editor, expand the collapsed Test pane and set the HTTP method to GET. Click Run to test your function. If all went well, a success message will be returned.

    Back at your Function code editor, open expand the collapsed Test pane and set the HTTP method to GET. Click Run to test your function. If all went well, a success message will be returned.

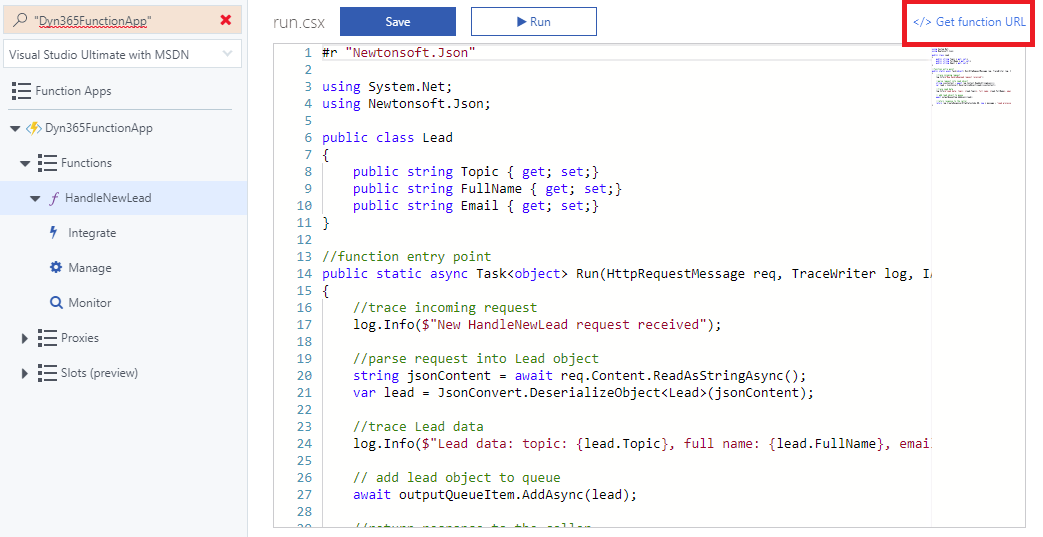
    Finally, click the </> Get function URL button on top and copy your function endpoint address.

  3. Define BirthdayGreetingSchduler Azure Scheduler

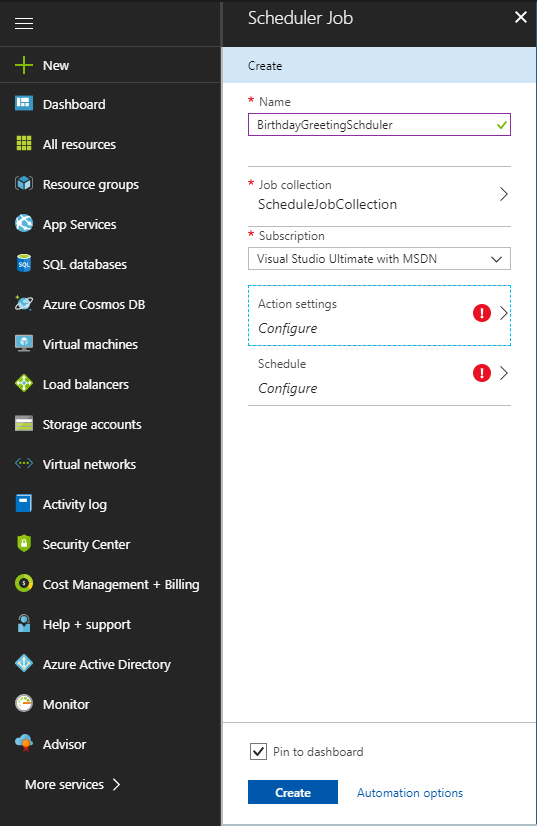
    Click the + New button on the left menu, type in Scheduler and select the Scheduler element returned. Click Create

    Click the + New button on the left menu, type in Scheduler and select the Scheduler element returned

    Define the scheduler name to BirthdayGreetingSchduler.

    Define the scheduler name to BirthdayGreetingSchduler

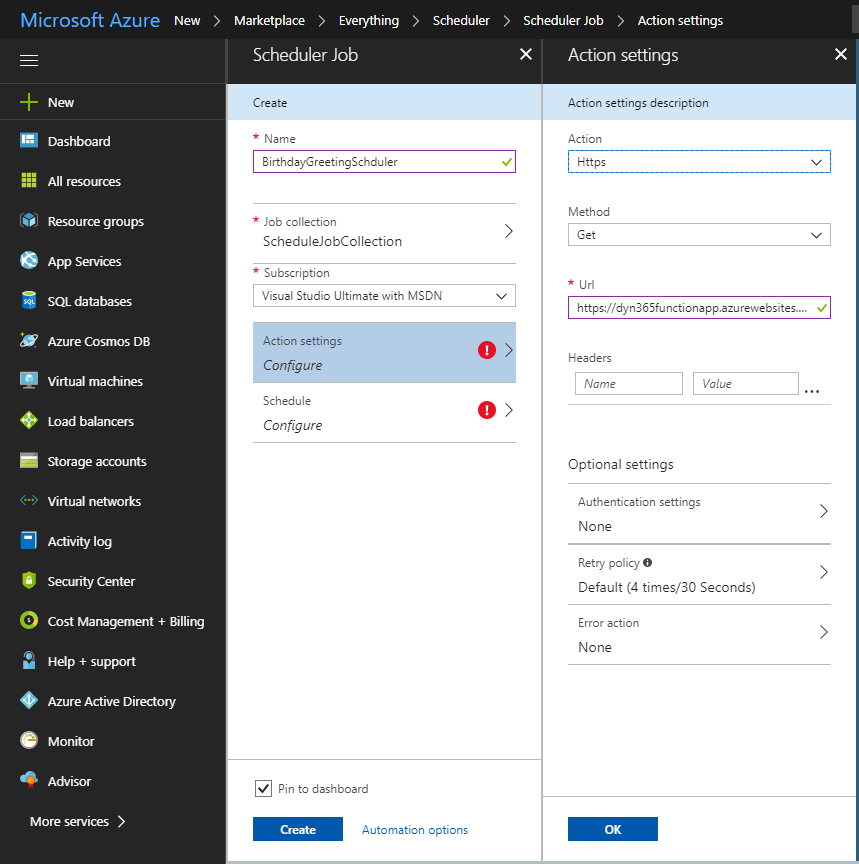
    Click the Action settings tile. Set the Action to Https, method to Get and paste in the Function URL you copied at the end of the step 2 above. Click OK

    Click the Action settings tile. Set the Action to Https, method to Get and paste in the Function URL you copied at the end of the step 2 above. Click OK

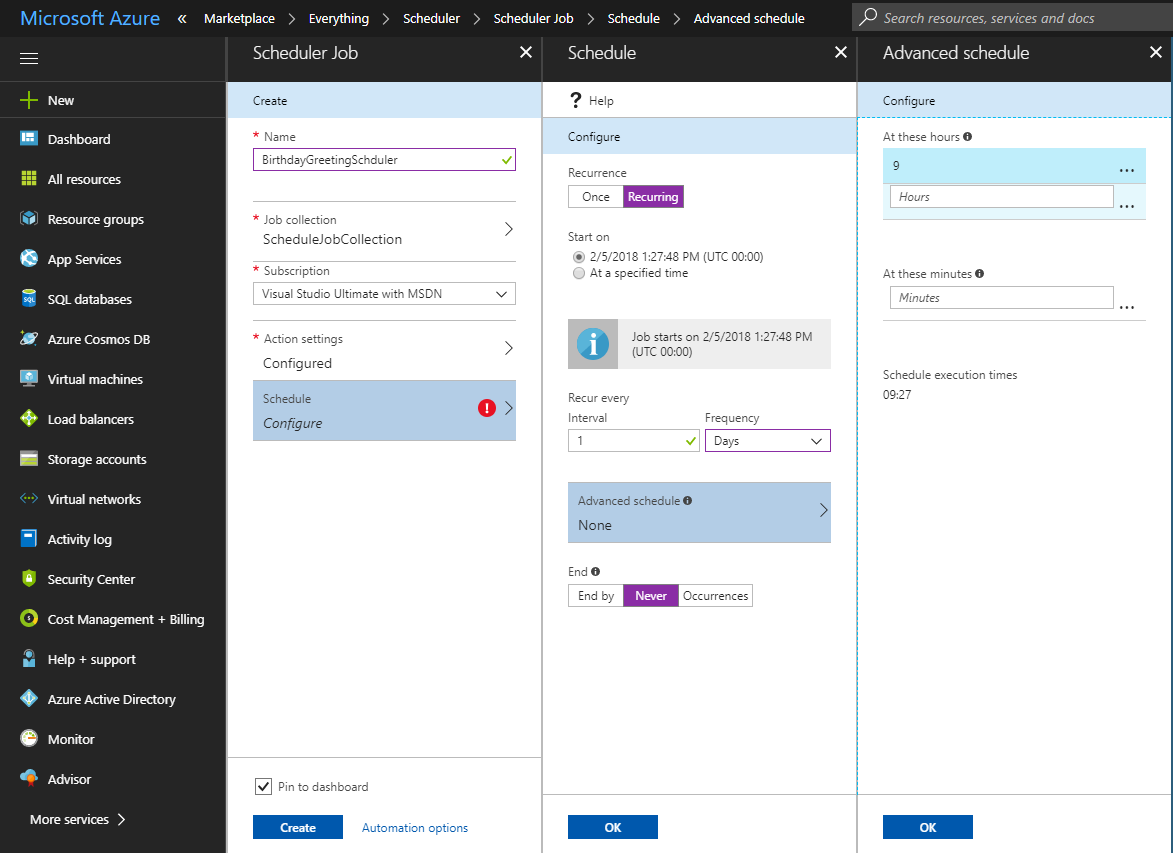
    Click the Schedule tile and set the schedule as Recurring, frequency to Days and End to Never. Click the Advanced schedule pane and set 9 in the Hours text box. Click Ok.
    This will trigger your function every day at 9:00 for unlimited number of times.
    Check Pin to dashboard and click Create.

    This will trigger your function every day at 9:00 for unlimited number of times.

    After a few seconds, you will be navigated to the Scheduler management area.

  4. Test

    To test the complete solution, update a Microsoft Dynamics 365 test Contact record birthdate to match the day and month of the current date.

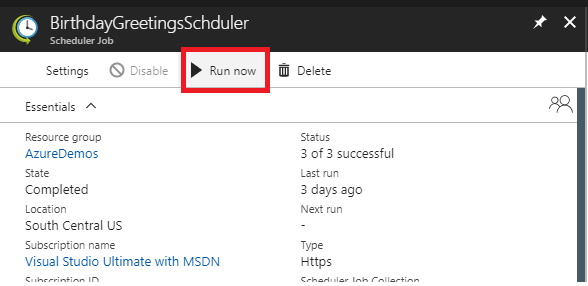
    Go back to your Scheduler Job and click Run now.

    Go back to your Scheduler Job and click Run now.

    Clicking the History tab, you can monitor the Schedule job completion status

    Clicking the History tab, you can monitor the Schedule job completion status

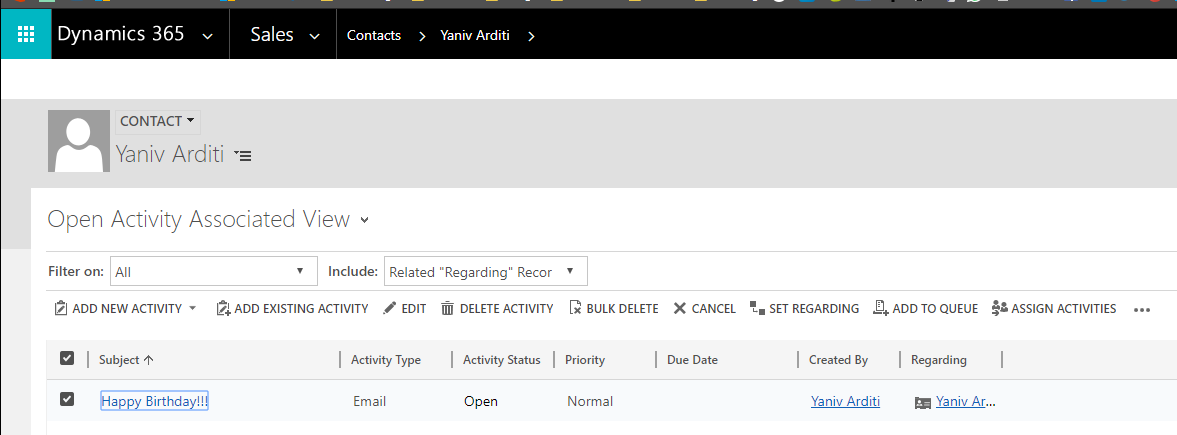
    Refreshing the Sample Contact activities list, you should be able to view the newly created Birthday greeting email
    Refreshing the Sample Contact activities list, you should be able to view the newly created email
Walkthrough: Execute Azure Function from Microsoft Dynamics Entity Form

Azure Function is a fantastic mechanism for various integration scenarios. Here are few key characteristics:

  • Being a serverless application, Azure Function has the best time to market when it comes to deploying a web service
  • Pay-per-use pricing model means you pay only for what you use
  • Built in integration options in PowerApps and Flow allows you to give non-developers new building blocks when designing application and processes
  • CORS (Cross-Origin Resource Sharing) support allows consuming Functions from server/client side in any domain you find suitable

What can you do with Azure Functions in the context of Microsoft Dynamics integration scenarios? Just about anything:

  • Export/Import data to/from external application/data storage
  • Notify an external application on a business event
  • Get notification from external source
  • Handle complex or lengthy computation process (considering the Plug-in/Custom Workflow Activity execution timeout limitation)
  • Allow a 3rd party to interact with your Dynamics 365 organization without directly exposing an Dynamics endpoint and access credentials

So Why would you want to Execute Azure Function from an Entity Form?

  • To provide responsive and fluent UX
  • To avoid writing Plug-in/Custom Workflow Activity code which is not easy to debug
  • To respond to form level events such as field value change as it occurs

In this post, I’ll walkthrough executing Azure Function from Microsoft Dynamics 365 Entity form. This walkthrough was set up with Microsoft Dynamics 365 v9.0 but can be easily adapted to v8.2.
My sample scenario demonstrates sending new Lead data to an Azure data storage using Azure Function. Off course, you can use this walkthrough with an On-premises deployment, but you will have to allow access to Azure.
Thank you Nishant Rana  for an enlightening post that helped setup this walkthrough.


  1. Setup an Azure Function App

    The Function App is a container that will contain your Functions and will allow you to manage these components.
    In your Azure Portal (open a trial if you don’t have a subscription), type in ‘Function App’ in the search box and select the Function App item in the Marketplace.

    Select Function App

    In the next dialog, type in the Function App name (which will be part of the function URL) and fill all other required fields.
    Create a new Resource Group if you need one as well as Storage. Pin your function to the dashboard for easy access.

    Define Function App

    After few seconds you will be navigated to the dashboard. Wait while your Function App is setup and then you will be navigated to the Function App design area

    Function App design area

    Click the Functions node and then click the ‘+ New function’ button to add a new Function

    Click the Functions node and then click the ‘+ New function’ button to add a new Function.

    Select the Generic webhook option coupled with C#  language

    Select the Generic webhook option coupled with C#  language

    In the next dialog, give your function a meaningful name and click ‘Create’

    In the next dialog, give your function a meaningful name and click ‘Create’
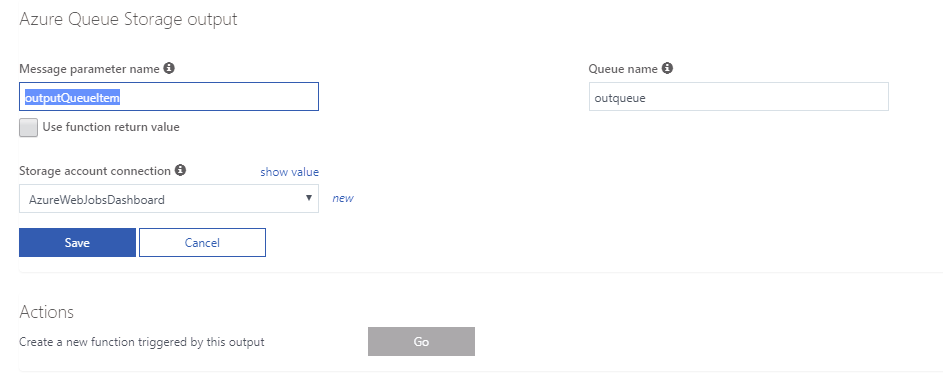
    Since we want to handle new Lead data by queuing it, click the Integrate node to add a new Function output and select the Azure Queue Storage.

    Since we want to handle new Lead data by queuing it, click the Integrate node to add a new Function output and select the Azure Queue Storage

    In the next dialog, note the Message parameter name as it will be part of the function code. Click ‘Save’

    In the next dialog, note the Message parameter name as it will be part of the function code. Click ‘Save’

    Click the Function node to access the Function code

    Click the Function node to access the Function code

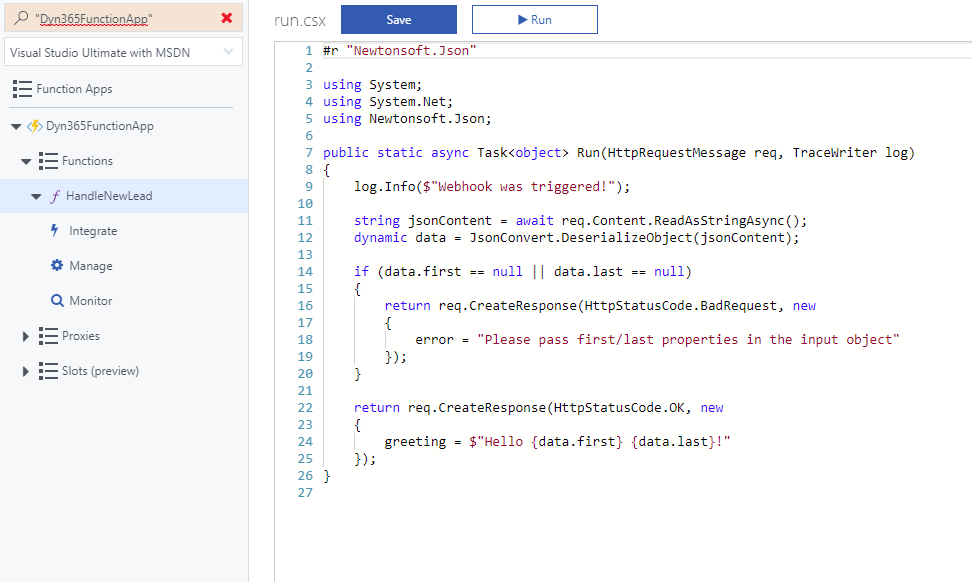
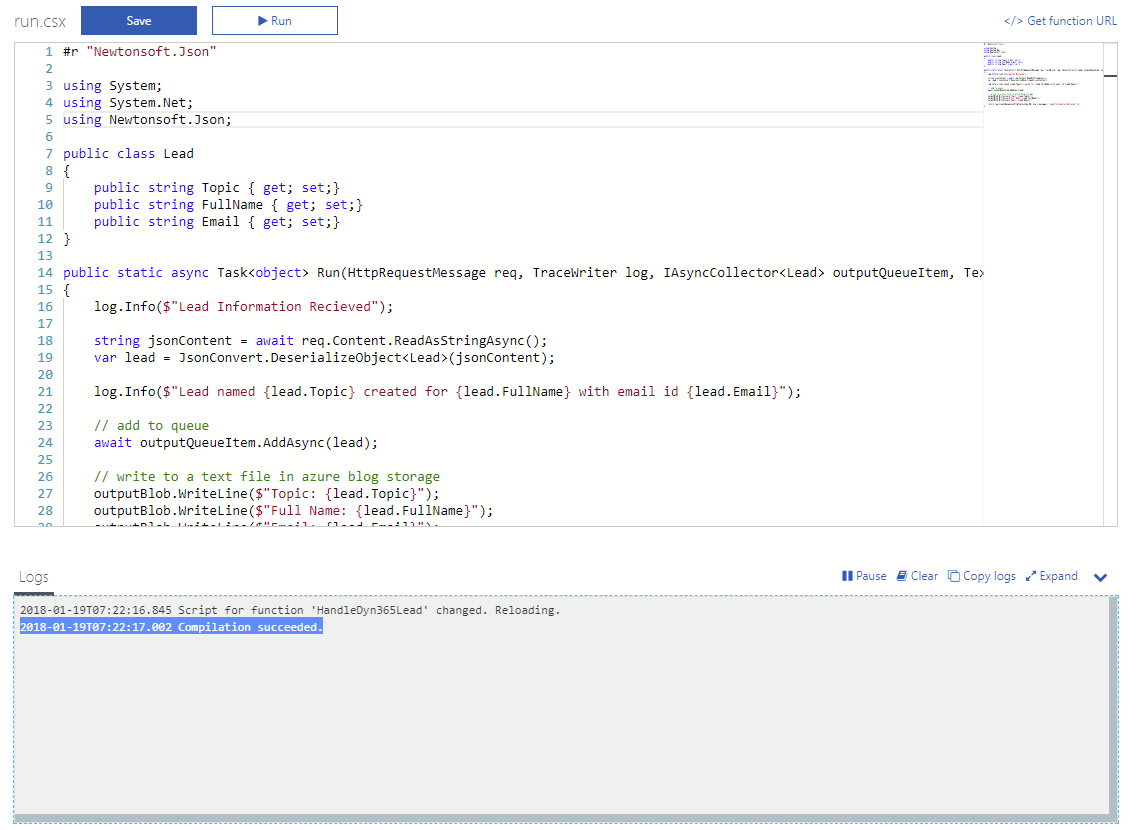
    Replace the existing code with the following code block and click ‘Save’

    #r "Newtonsoft.Json"
    
    using System.Net;
    using Newtonsoft.Json;
    
    public class Lead
    {
        public string Topic { get; set;}
        public string FullName { get; set;}
        public string Email { get; set;}
    }
    
    //function entry point 
    public static async Task Run(HttpRequestMessage req, TraceWriter log, IAsyncCollector outputQueueItem)
    {
        //trace incoming request 
        log.Info($"New HandleNewLead request received");
    
        //parse request into Lead object
        string jsonContent = await req.Content.ReadAsStringAsync();
        var lead = JsonConvert.DeserializeObject(jsonContent);
    
        //trace Lead data
        log.Info($"Lead data: topic: {lead.Topic}, full name: {lead.FullName}, email: {lead.Email}");
    
        // add lead object to queue
        await outputQueueItem.AddAsync(lead);
    
        //return response to the caller 
        return req.CreateResponse(HttpStatusCode.OK, new { message = "Lead processed successfully" });
    }

    Opening the Logs pane below, you can see a successful compilation message

    Opening the Logs pane, you can see a success compilation message

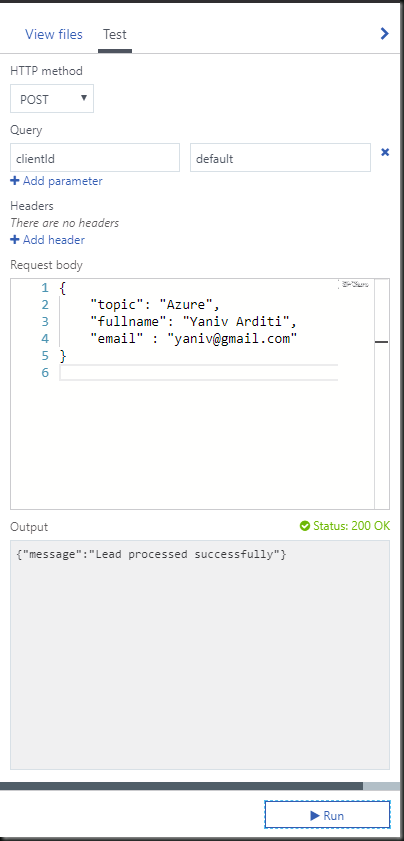
    To test your Function, open the right pane and click the Test tab. Feed in some test JSON data and click Run. If all went well, you will receive a success message as well as a Function response

    To test the function, open the right pane and click the Test tab. Feed in some test JSON data and click Run

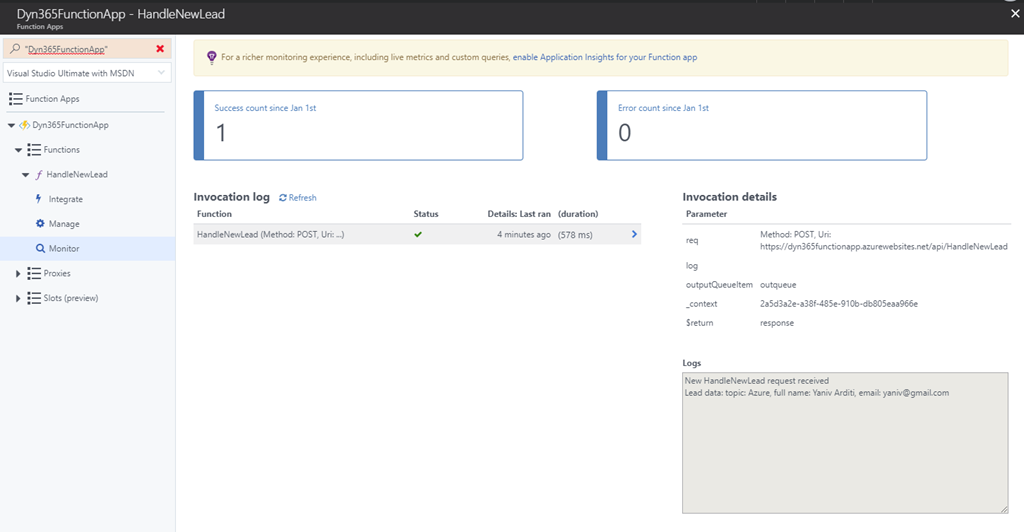
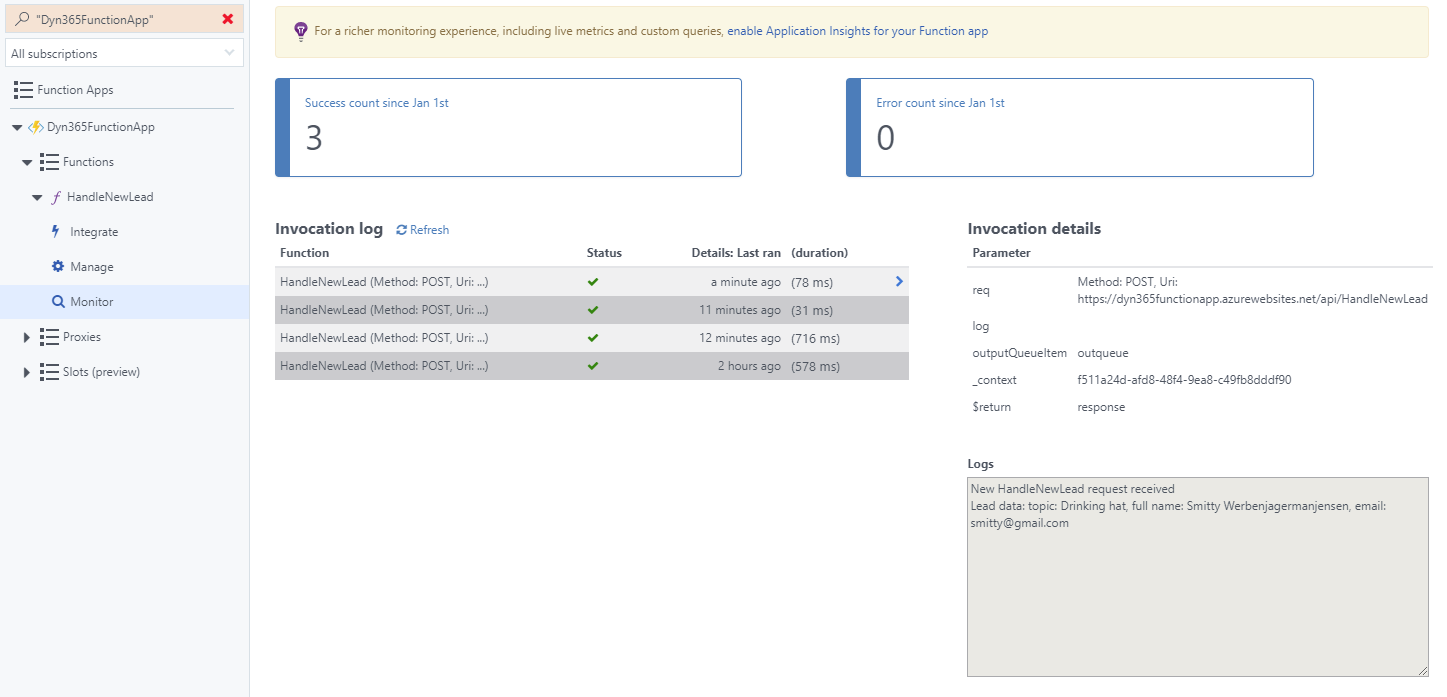
    Clicking the Monitor node, you can see the queued test Lead data

    Clicking the Monitor node, you can see the queued Lead data

    Before leaving the Function area, click the Get function URL and copy it. You will be using it later in your Entity form JavaScript code

    Before leaving the Function area, click the Get function URL and copy it

  2. Configure Cross-Origin Resource Sharing

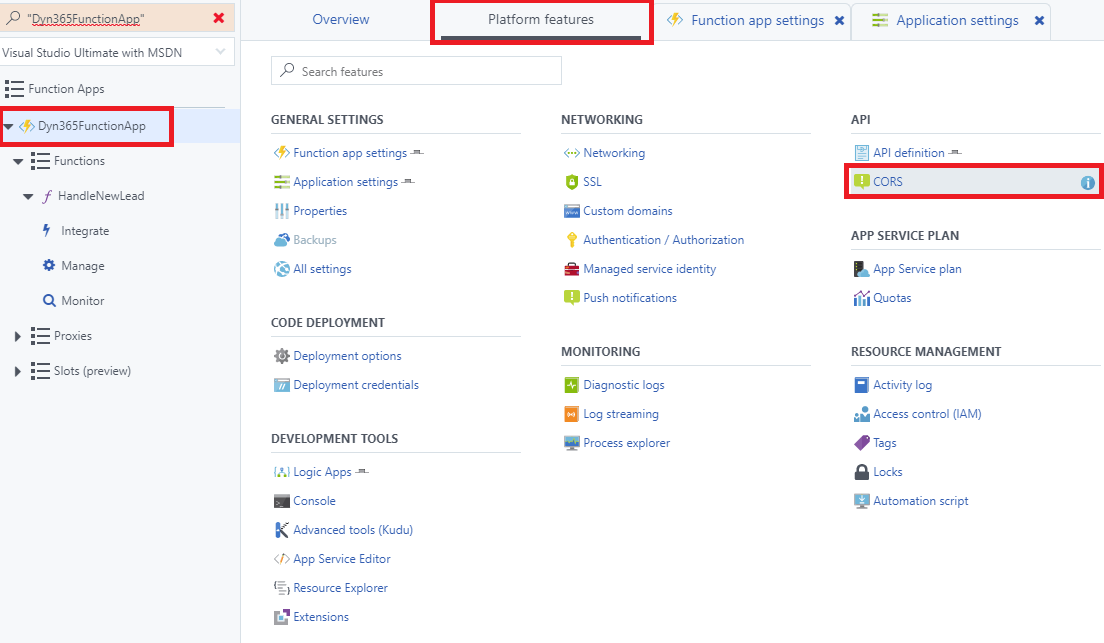
    In order to consume your Function from Microsoft Dynamics 365 organization which may be residing in a different domain, you’ll need to define it as an allowed origin under the CORS element:

    In order to consume your Function from Microsoft Dynamics 365 organization which may be residing in a different domain, you need to define it as an allowed origin under the CORS element

    Add your Microsoft Dynamics 365 organization base URL and click ‘Save’

    Add your Microsoft Dynamics 365 organization base URL and click ‘Save’

  3. Setup entity form code and event

    Head into your Microsoft Dynamics 365 organization and define a new JavaScript Web Resource named dyn_AzureServicesLib.js with the following code.
    Replace the AZURE_BASE_ENDPOINT and AZURE_FUNCTION_ENDPOINT constants with the Function URL you copied earlier. Note the separation of the base URL part from the the function and code part

    (function (ns) {
    
        //constants 
        Constants = function () {
            this.CALLING_MODULE_NAME = "dyn_AzureServicesLib.js";
            this.AZURE_BASE_ENDPOINT = "https://dyneventhandlersample.azurewebsites.net/api/";
            this.AZURE_FUNCTION_ENDPOINT = "HandleNewLead?code=xxx";
            this.FORM_TYPE_CREATE = 1;
            this.MSG_OPERATION_SUCCESS = "Lead successfully exported :)";
            this.MSG_OPERATION_FAILURE = "Something went wrong :(";
    
            return this;
        }();
    
        //members
        var formContext = null;
    
        //public methods 
    
        //Export newly created Lead record to external storage/application 
        ns.exportLead = function (executionContext) {
            debugger
    
            //get form context 
            formContext = executionContext.getFormContext();
    
            //get form type
            var formType = formContext.ui.getFormType();
    
            //operate for newly created records only
            if (formType == Constants.FORM_TYPE_CREATE) {
                //extract Lead details        
                var lead = {
                    firstname: formContext.getAttribute("firstname").getValue(),
                    lastname: formContext.getAttribute("lastname").getValue(),
                    email: formContext.getAttribute("emailaddress1").getValue()
                }
    
                //send Lead details to Azure Function 
                executeAzureFunction(lead, handleExportSuccess, handleExportFailure);
            }
        }
    
        //private methods
    
        //handle opertation success
        handleExportSuccess = function (response) {
            formContext.ui.setFormNotification(MSG_OPERATION_SUCCESS, "INFO", null);
        }
    
        //handle opertation failure
        handleExportFailure = function (response) {
            formContext.ui.setFormNotification(MSG_OPERATION_FAILURE, "ERROR", null);
        }
    
        //execute Azure Function to process Lead details
        executeAzureFunction = function (lead, successHandler, failureHandler) {
            debugger
    
            //set Azure Function endpoint
            var endpoint = Constants.AZURE_BASE_ENDPOINT + Constants.AZURE_FUNCTION_ENDPOINT;
    
            //define request
            var req = new XMLHttpRequest();
            req.open("POST", endpoint, true);
            req.setRequestHeader("Accept", "application/json");
            req.setRequestHeader("Content-Type", "application/json; charset=utf-8");
            req.setRequestHeader("OData-MaxVersion", "4.0");
            req.setRequestHeader("OData-Version", "4.0");
            req.onreadystatechange = function () {
                if (this.readyState == 4) {
                    req.onreadystatechange = null;
    
                    if (this.status == 200) {
                        successHandler(JSON.parse(this.response));
                    }
                    else {
                        failureHandler(JSON.parse(this.response).error);
                    }
                }
            }
            //send request
            req.send(window.JSON.stringify(lead));
        }
    })(window.AzureServicesLib = window.AzureServicesLib || {});
    

    Next, go to the Lead entity form designer and add the dyn_AzureServicesLib.js Web Resource in the Form Properties dialog.
    Bind the form OnSave event to the AzureServicesLib.exportLead function.  Make sure you check the ‘Pass execution context…’ option.
    Save and Publish.

    add the dyn_AzureServicesLib.js Web Resource in the Form Properties dialog

    Make sure you check the ‘Pass execution context…’ option

  4. Test

    Create a new Lead record and save it. If all went well, you will see a form level success notification

    Create a new Lead record. If all went well, you will see a form success notification

    Going back to your Function monitoring area, you should see your new Lead data queued successfully

    Going back to your Function monitoring area, you should see your new Lead data queued successfully

Sandbox Execution Timeout

While reviewing existing Microsoft Dynamics 365 Online implementations, I have noticed a repeating assumption by which Custom Workflow Activity, executing within an a-synchronous process, is not subjected to the sandbox 2 minutes execution timeout limitation.
This false assumption led to wrong architectural designs in which long running processes are assigned to be handled by CWA components.

As this article states, Custom Workflow Activity code registered to work in sandbox mode is subjected to the 2 min. execution timeout limit, just like Plug-in code. If you want to test this declaration yourself, just put a Sleep statement in your CWA code and get the following exception for both sync. and a-sync. processes:

The plug-in execution failed because the operation has timed-out at the Sandbox Host

So here are my tips regarding the Sandbox timeout limitation:

  1. Plan for big scales: You may have hundreds of records to process on day 1, but in a year or two, you might have thousands and your CWA/Plug-in component will start hitting the execution timeout limit.
  2. Use the right tool: Both CWA and Plug-in components are not meant for heavy lifting. For potentially long running processes or complex computations, these mechanisms should be used only as event wrappers, triggered by a business event and passing on execution to a more robust and manageable mechanisms such as Azure App Services, Azure Functions or other external mechanisms.

  3. Handle all exceptions: You can easily hit the the timeout limit, especially when integrating external services which you have no control of and may not response in a timely manner.
    In general, If you don’t handle exceptions, your business logic may disgracefully break and your users/clients might experience some ugly ass raw exceptions.
    While handling exceptions, you can single out timeout exception by testing the exception status:
    catch (WebException exception)
    {
    string str = string.Empty;
    if (exception.Response != null)
    {
    using (StreamReader reader = new StreamReader(exception.Response.GetResponseStream()))
    {
    str = reader.ReadToEnd();
    }
    exception.Response.Close();
    }
    if (exception.Status == WebExceptionStatus.Timeout)
    {
    throw new InvalidPluginExecutionException(
    “The timeout elapsed while attempting to process the request.”, exception);
    }
    throw new InvalidPluginExecutionException(String.Format(CultureInfo.InvariantCulture,
    “A Web exception occurred while attempting to process the request. {0}: {1}”, exception.Message, str), exception);
    }
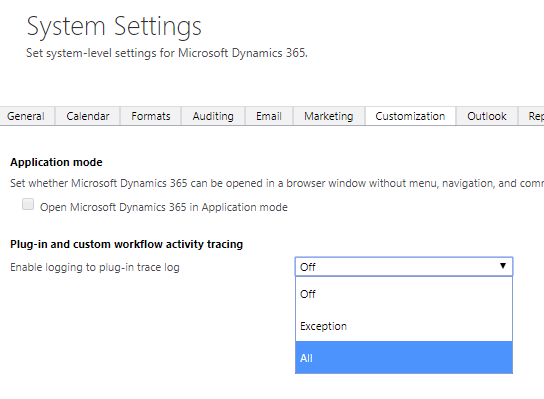
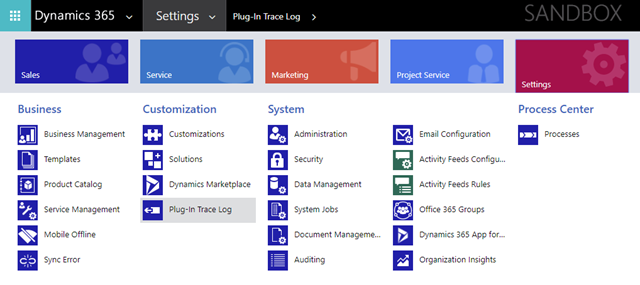
  4. Diagnose: You can diagnose your CWA/Plugin components by using the Trace service in your code. Tracing can be easily switched to display all tracing, just error or turned off by setting the Plug-in and custom workflow activity tracing in the Organization Settings dialog and then viewed in the Plug-in Trace Log area.
    Tracing all incoming parameters values (as this article suggests) can help you better diagnose your CWA operations.

    Plug-in and custom workflow activity tracing in the Organization Settings dialog
     Plug-in Trace Log area

  5. Monitor: Sandbox Run time statistics can help you monitor your Plug-in/CWA performance over time, failures and running time metrics.
    Run the following FetchXML query to get statistics about your component. Replace the name attribute value with your component name.
    Note the averageexecutetimeinmilliseconds and failurecount results – it might indicate that your business logic is failing or close to failure.

    <fetch>
    <entity name=”plugintypestatistic”>
    <attribute name=”averageexecutetimeinmilliseconds” />
    <attribute name=”failurecount” />
    <attribute name=”failurepercent” />
    <attribute name=”crashpercent” />
    <attribute name=”crashcount” />
    <link-entity name=”plugintype” from=”plugintypeid” alias=”PluginType” to=”plugintypeid”>
    <attribute name=”isworkflowactivity”></attribute>
    <attribute name=”typename”></attribute>
    <filter>
    <condition attribute=”name” operator=”eq” value=”MyProject.Workflows.ProcessSomething“></condition>
    </filter>
    </link-entity>
    </entity>
    </fetch>

Big Promise: 2011 SOAP Endpoint Silent Retire

I noticed the following note in the developer guide article.

image

This note embodies a big promise for many organizations that are currently planning or actually migrating from version 2011 (and up) to version Dynamics 365, as it removes (or at least dramatically postpones) a big chunk of work required to migrate code that uses the 2011 SOAP endpoint to use Web API endpoint.  In typical enterprise level projects (versions 2011 to Dynamics 365) the 2011 SOAP Endpoint (a.k.a OrganizationService) is heavily used in Plug-ins, Custom Workflow Activity components, external application integration and even client side code.

For organization planning an application re-do (rather than an upgrade) this means an option to re-use existing code investments (e.g. non-changing integration points with external applications).

When considering an upgrade to Microsoft Dynamics 365, code components migration is a primary workload for most organizations. Although it is recommended to use the modern Web API, reducing or eliminating this workload means a whole different time frames and resources requirements for the migration process.

Non-interactive Access Mode

Why would you want to set Access Mode for user to Non-interactive? 

Setting the Non-interactive access mode fro a user will prevent him from accessing Dynamics 365 application UI in any official Dynamics 365 client: Web, Outlook and mobile. While human users need an GUI to actually do some work, external applications interacting with Dynamics 365 do not. Note that security mechanism such as Security Roles, Field Level Security etc. apply to users with Non-interactive access mode just as Read-Write users.

Assigning the Non-interactive access mode to applicative users used for interaction with external applications is a good security best practice as long as you assign the most restrictive Security Roles rather than System Administrator. This way, if this user’s credentials are breached, a potential attacker can access via API only, limited to the data scope and operations dictated by the Security Roles to begin with. 

If you do use the Non-interactive access mode for applicative user, consider the password renewal policy for this user, as there is not human on the the other side to actually change the password. This means that dependent integration points may fail due to expired password.
For more details about setting up a Non-interactive user follow this article.

image

Microsoft Dynamics 365 – Send SMS using Flow

Looking at the list of traditional CRM activities I always miss the SMS, being a common and effective type of communication between organizations and customers.
Sending SMS triggered by Microsoft Dynamics 365 events (e.g. Case created) used to be a developer’s task. You had to write Plugin or Custom Workflow Activity code to access the SMS provider web service and maintain it as endpoints sometime change.

With Flow you can integrate applications in a declarative manner so an event in one application will trigger an action in another application along with custom conditional logic and even wait capabilities (similar to Dynamics 365 internal Workflow Wait step). 

In this post, I’ll walkthrough the process of setting up SMS sending without coding using Flow and Twilio (SMS provider).

  1. Prerequisites

    Before advancing make sure you have the following:

    a. Microsoft Dynamics 365 instance (trial will do)
    b. Twilio account (trial will do – click +sign up in Twilio home page)

  2. Setting up Twilio account

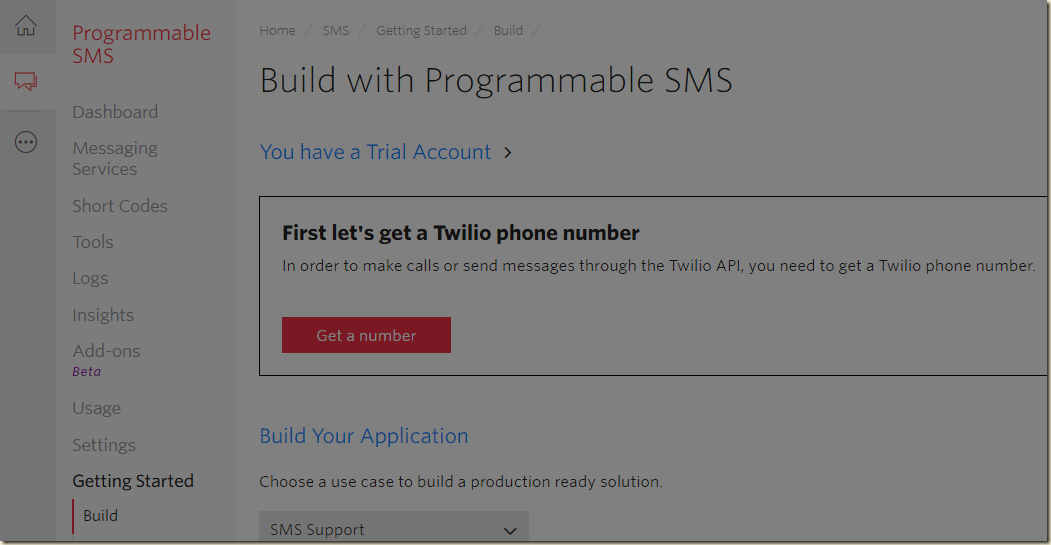
    a. In your Twilio Account console, click ‘Get a number’ button under the build menu

    Setting up Twilio account

    b. In the dialog, choose the suggested number or select a different one.
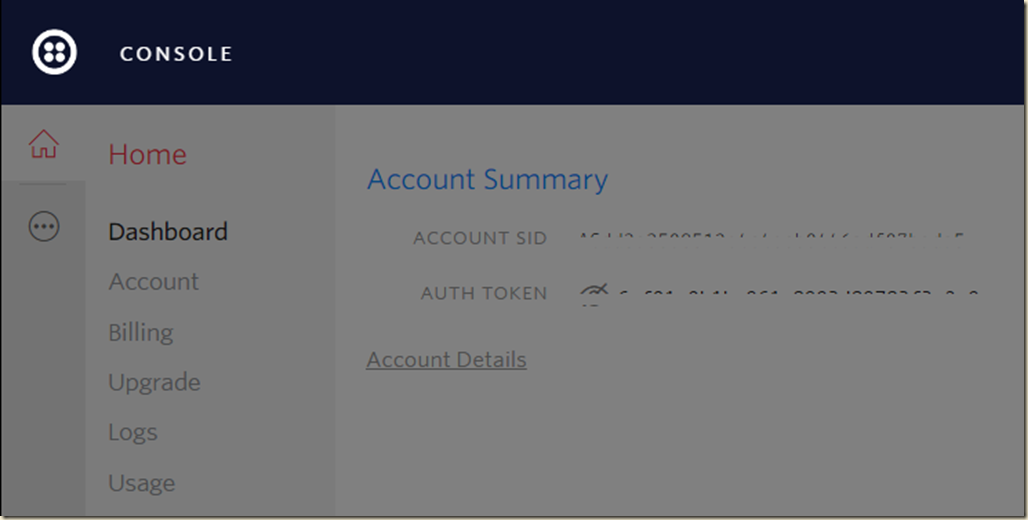
    c. Go to the Home tab and note the Account SID and Auth Token keys, you will need these later

    Setting up Twilio account

  3. Setting up Flow

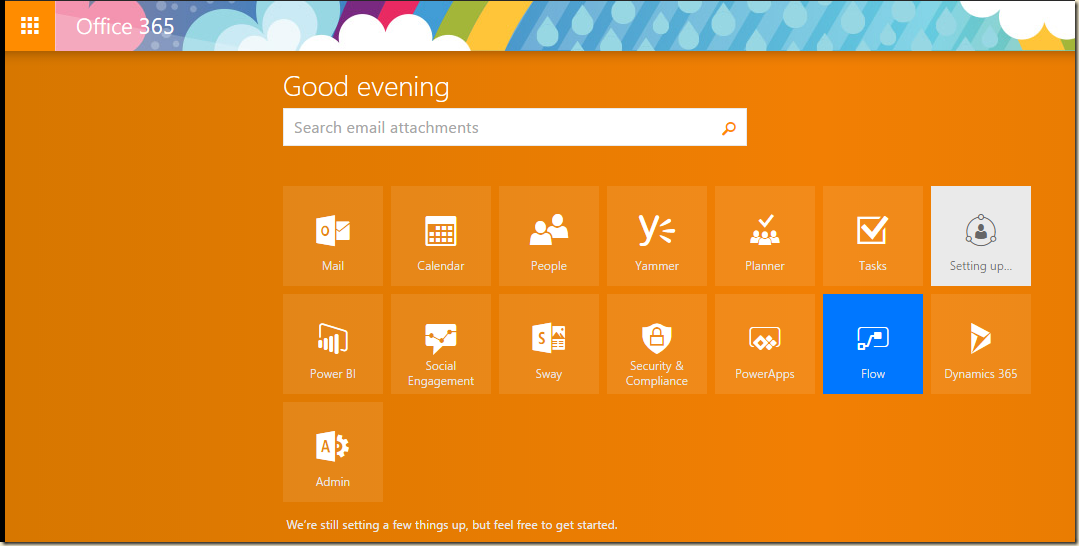
    a. Login to your Office 365 environment and click the Flow tile

    Setting up Flow 

    b. In My Flows tab click the ‘+ Create from blank’

    image

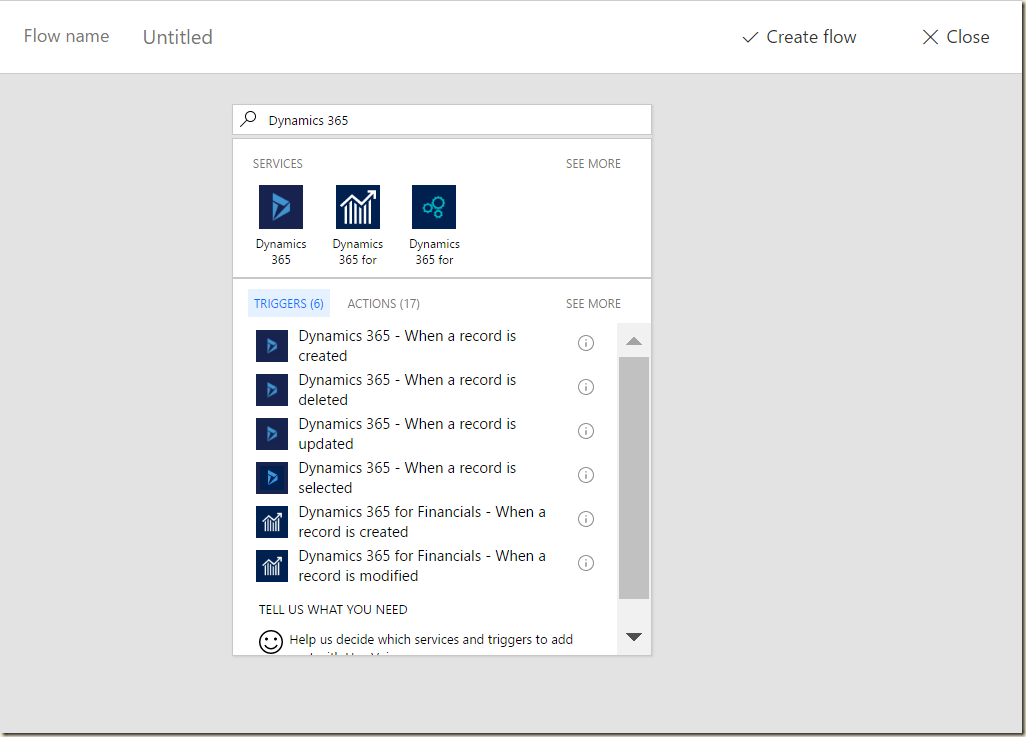
    c. In the search box, type in Dynamics and from the results list select the ‘Dynamics 365 – When a record is created’ trigger 

    Setting up Flow

    d. In the Organization Name select the name of your Dynamics 365 instance. In the entity name dropdown select the entity for which the Flow will listen

    Setting up Flow

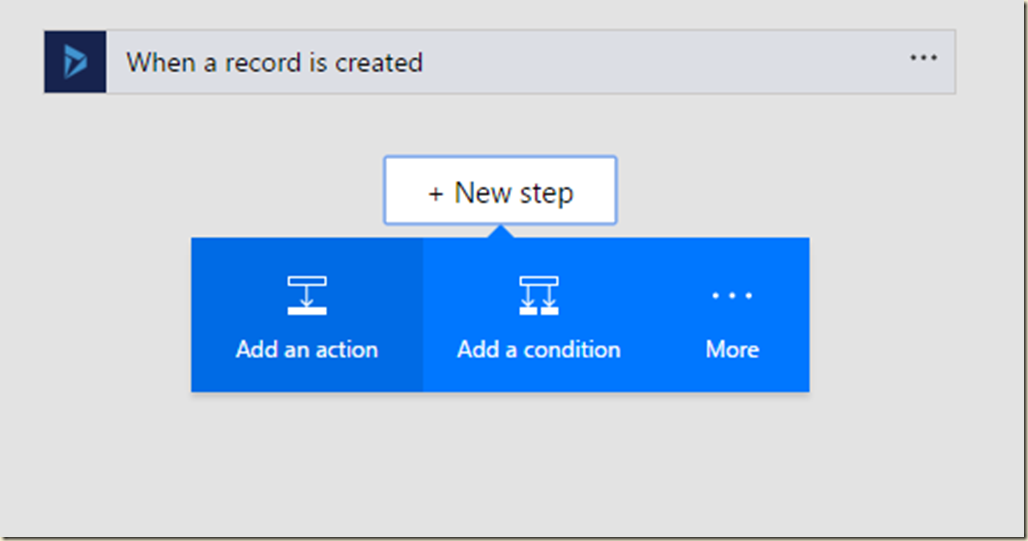
    e. Click the ‘New Step’ button and then ‘Add an action’

    Setting up Flow

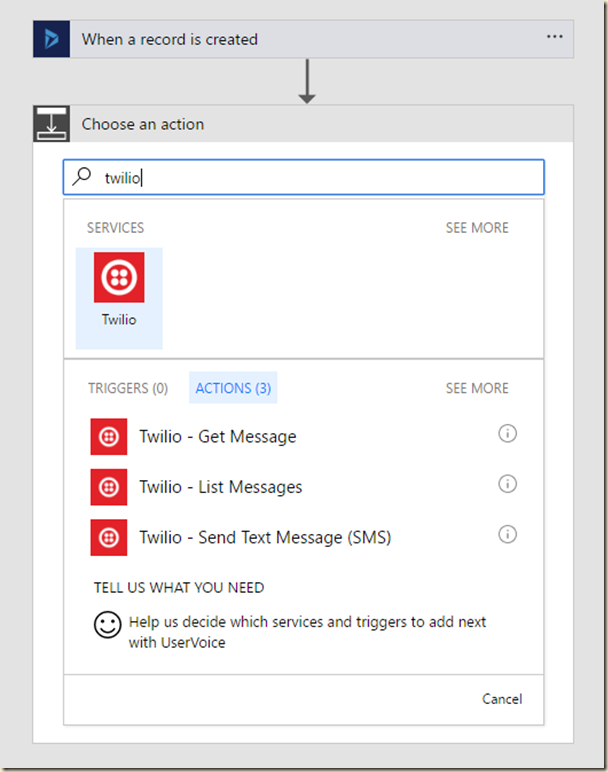
    f. Search and Select the Twilio – Send Text Message (SMS) action

    Setting up Flow

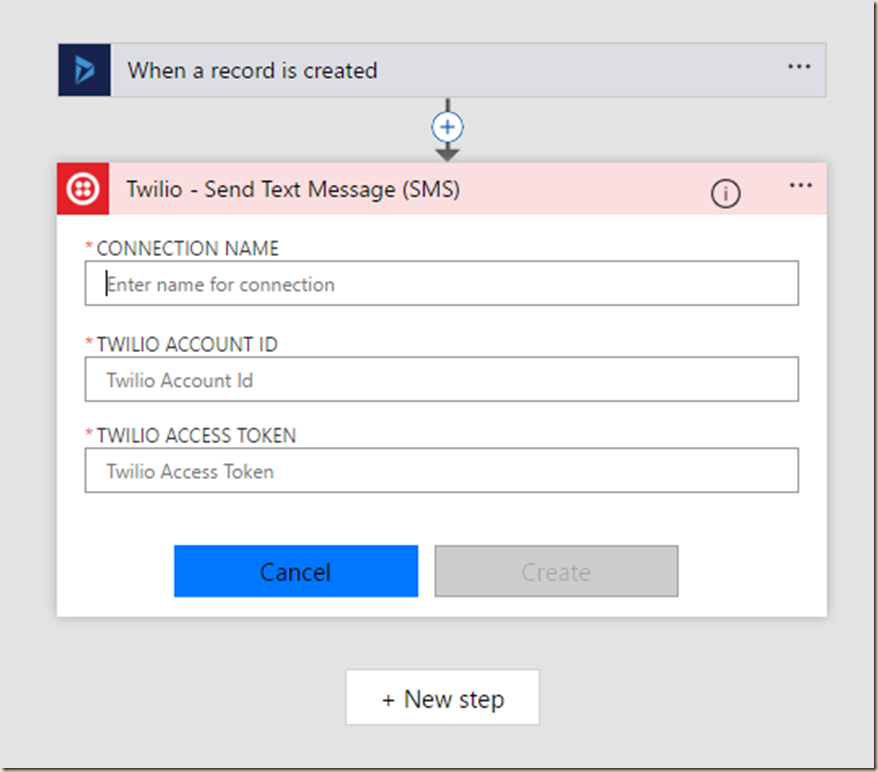
    g. Feed in a name for your Twilio account (for future Flows) and keys from your Twilio Home tab: Account SID goes into the Account ID box, Auth token goes to the Access Token box

    Setting up Flow

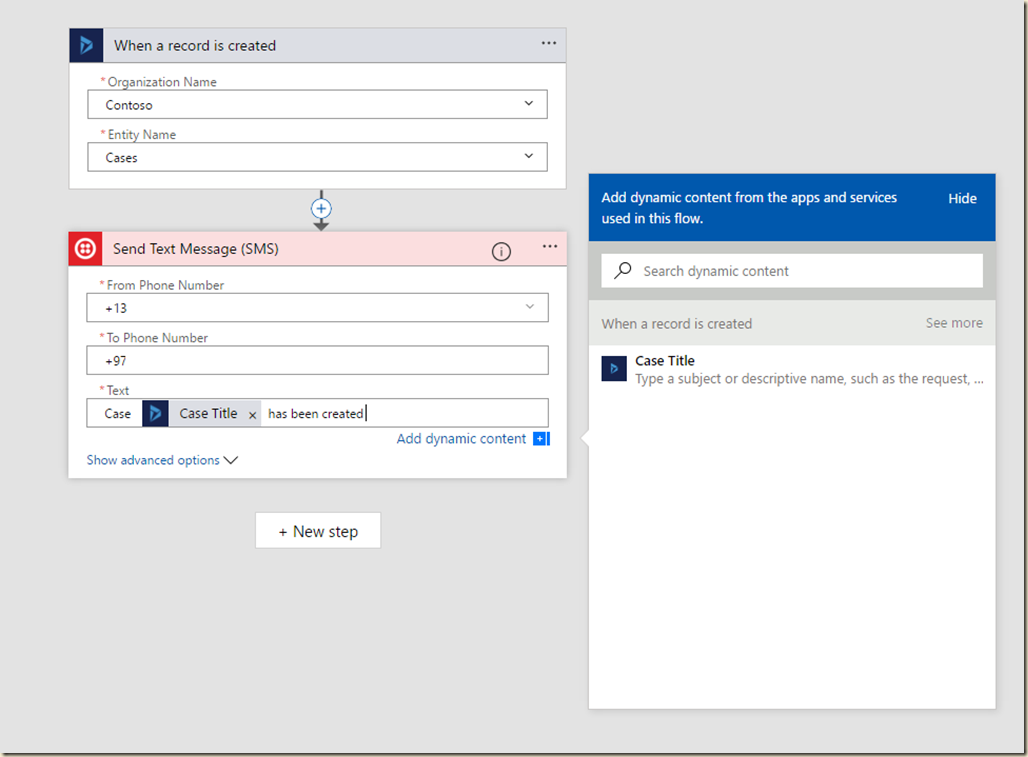
    h. Feed in the your Twilio assigned Phone number in the From Phone Number box. Feed the target phone number in the To phone number. Feed in the SMS text. Note you can map dynamic data from the Case record into the text or target phone number

    Setting up Flow

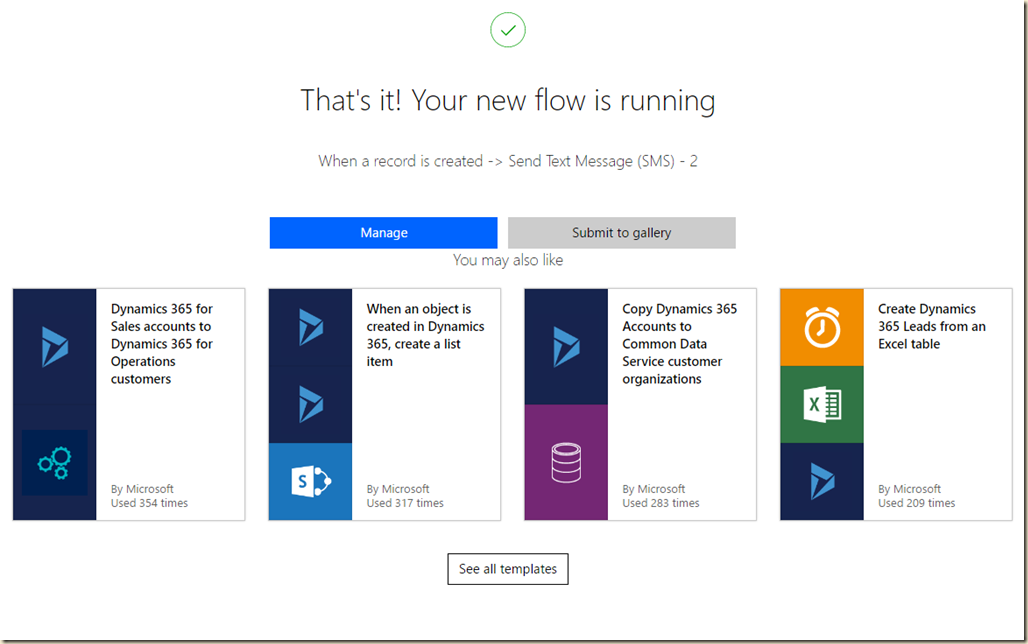
    i. Click ‘Create Flow’ and then ‘Done’ 
     

  4. Testing & Monitoring
    a. In your Dynamics 365 create a new Case.
    b. After a few seconds, you should get a SMS message

    After a few seconds, you should get a SMS message

    c. In Flow management console Click ‘Manage’
    Testing & Monitoring 

    d. You can view your Flow, edit and deactivate it here. Clicking the i will show you the Flow instances details and running results 
     
    Testing & Monitoring


Implementation Notes

  1. It may take Flow some time to kick in. If you didn’t get an SMS message after creating the first Case, create another
  2. Twilio trial account will grant you a limited amount of SMS messages and each message will starts with ‘Sent from a Twilio Trial account’
  3. Twilio supports sending messages in these countries

@microsoft.com

I am back.

It has been a while since my last post. About a month ago I started a new job as a Dynamics TSP (Technology Solution Professional) at Microsoft. It is a technical role aimed to support Dynamics related sales processes.
Sadly, It means giving up my MVP title, as Microsoft employees are not eligible for this award. 

This is a major change for me. In the last 8 years I was self employed of a sort, without a regular schedule, office or boss. Switching to work in one of the largest corporations on the planet is overwhelming. But in a good way. Although I am still drinking from the firehose, I can now access deep and broad layers of knowledge I was missing before.

I have been writing this blog since 2009 and plan to continue. Although I am a Microsoft employee now, the opinions and views stated in this blog are my own.

So now, armed with new knowledge and super powers, this blog is getting even better. Stay tuned. 

Drag & Drop File Upload (part 1)

I have been planning to do this for over a year now, finally found the time. Started learning HTML5 (I recommend Pluralsight courses), and this is my first project.

In version 2016, Microsoft finally introduced some drag & drop file upload for the Word/Excel template feature, but that’s it. I would like to have similar UX in entity forms and Dashboards.

In this two-parts post, I’ll describe a working solution that allows users to upload a file by dragging it to a specific area in any business entity form or Dashboard.
The solution version available in this post adds an uploaded file as an attachment to a new Note record related to the context business entity. The next post version will use a more modular approach that can be used if you manage files outside of Microsoft Dynamics CRM database.


WIIFM?

An unmanaged solution can be downloaded here. Feel free to change the code to better suit you needs.

As this solution relies on HTML5 features, it will probably not work with early browsers versions. I tested it successfully with IE 11, Edge and Google Chrome v54.0.2840.71.
The solution uses the Web API service and therefore suitable for Microsoft Dynamics CRM 2016 Online and on-premise. For earlier MSCRM versions, some changes are required (read the Bits & Bytes section below)

Drag and Drop demo

Using the Solution

  1. Download, import and publish the Drag & Drop File Upload solution
  2. Add a Web Resource control to any business entity form
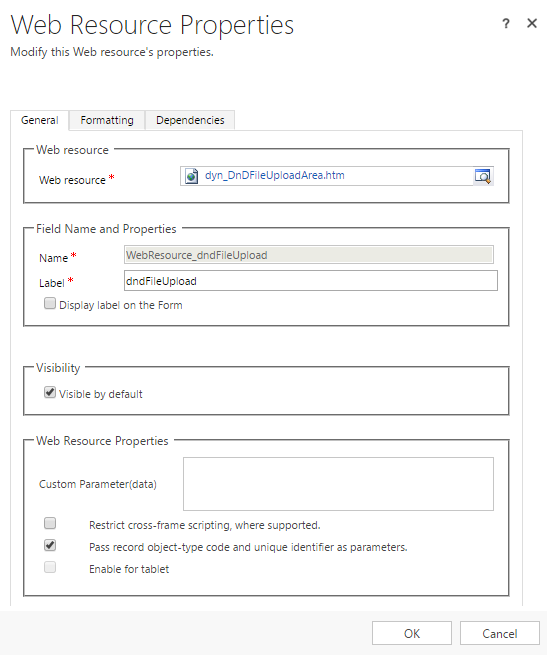
  3. In the Web Resource form, make sure the “Pass record object-type code…” option is checked
  4. Set the Web Resource format to span over 13 rows at least
  5. Map the Web Resource control to the dyn_DnDFileUploadArea.htm Web Resource
  6. Save & publish
  7. Drag n Drop like crazy

    image

Bits & Bytes

  • The solution code portion is contained in the dyn_DnDServices.js Web Resource
  • As the code uses Web API to create a Note record, it will not work with versions earlier than 2016. You can adapt the solution to earlier MSCRM versions by changing the createRecord function in the dyn_DnDServices.js Web Resource to use the OrgannizationData Service (REST) or the Organization Service (SOAP) to create a Note (Annotation) record
  • The code prevents uploading some file types (exe, js, etc.) according to the default blocked file extensions defined in the System Settings area. Maximum uploaded file size is also limited. Both settings are managed as constants and can be easily changed

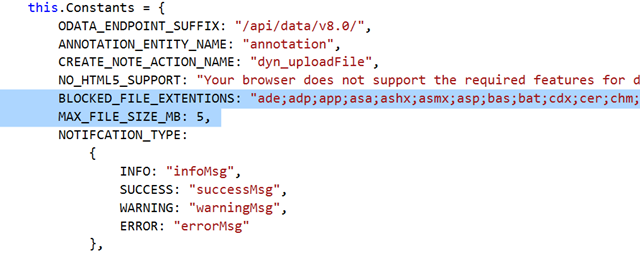
    Managing blocked files extentions and file size settings   

  • I considered retrieving the blocked file extensions from the server instead of managing as constant. I opted for constants as I rather have better performance all year round over minor maintenance effort required once a year or maybe never 
  • You can can position the dyn_DnDFileUploadArea.htm Web Resource in a Dashboard. It will create Note record along with file attachment but will not relate it to any business record
  • Unfortunately, there is no supported manner to refresh the native Notes control. It would have been useful to automatically display the latest note after uploading a file

Get (Online) Ready

If your Microsoft Dynamics CRM organization is deployed on-premise and Online is not even a remote option, stop reading now, this post not for you. Or is it?

Most of my clients are enterprise level organizations with Microsoft Dynamics CRM deployed on-premise. But even in these organizations, Online is no longer a theoretic concept. Sooner or later, Online is coming…oh wait. it’s here.

Following are some tips which implemented today may render your migration to Online a bit easier in the future, but will probably make your life easier even while on-premise.

1. Keep it supported
There is an infinite number of unsupported customization methods and even more available for an on-premise deployment: direct database access, using database triggers, editing ASPX and CSS files, adding HTTP modules…the list goes on.
If you currently implement any of the methods mentioned above, start planning to replace it with a supported customization method, since these are not viable in Online deployment.

2. Get Sandboxed
Although on-premise you can register Plug-in and Custom Workflow Activities DLLs in full trust, I suggest registering these components to Sandbox mode.
In Online deployment, Plug-in and Custom Workflow Activities DLLs can only execute in sandbox, but even on-premise you can benefit from the sandbox isolation in security and performance aspects.
If you have code that exceeds sandbox limitations (file system/database access etc.), consider moving it to a different component such as an external Web Service.

3. Solution contained
Whenever possible, prefer a solution aware component rather than an external component. HTML (JavaScript, Images etc.) Web Resource over an external ASPX page, Action over a WCF/ASMX service. This will simplify your deployment process considerably even when moving a version between your on-premise test and production environments

4. Go Client
Whenever possible, prefer client side business logic over server side. Implementing business logic using JavaScript rather than Plug-in/Synchronous Workflow will yield better UX and reduce maintenance efforts in any deployment type:

  • There is a plethora of free utility JS libraries that can simplify and expedite your business logic implementation
  • JavaScript code does not require re-compilation
  • Debugging JavaScript code does not require in external tool (the browser developer tools will suffice)

Note that in Online deployment you can’t debug Plug-in/CWA components with the Attach To Process technique as server processes are not exposed.

5. Use modern APIs
Upgrade existing code to use the latest Microsoft Dynamics CRM APIs and end points. These APIs will last longer along with your business logic code and probably have performance and maintenance benefits.
When Online, old APIs and end points have higher probability to be decommissioned whether you like it or not.

6. Exposable Integration points
Integrating Microsoft Dynamics CRM with external on-premise applications is common in enterprise level applications.
Assuming some of these external applications will remain on-premise, make sure the integration points can be exposed directly or indirectly to Microsoft Dynamics CRM Online and vice versa in a secured and simple manner. Integrating an external application via a Web Service is preferred over consuming database stored procedures.

Accessing Form Header Web Resource

Although this Help article states that with Microsoft Dynamics CRM 2016/Online “You can’t include a web resource in a form header or footer”, you certainly can.

Sadly, form Footer Web Resource no longer display any content (as it did in version 2015). Form header displays content correctly, but adding it will spread the header fields all over the form width.

adding web resource will spread the header fields all over the form width

If you are ok with the UI, you might want to access the header Web Resource programmatically via JavaScript. Maybe when a form attribute value changes, the Web Resource content should change dynamically.
Unlike header attributes, which can be accessed using
  Xrm.Page.getControl(“header_name”), the header Web Resource can not be accessed this way as it seem to be invisible to the getControl function.

So how can the header Web Resource ‘Listen’ to form and field events?

Since Web Resource can access the Xrm.Page object via the parent object, it has full access to the form elements and events. The addOnChange function allows the the Web Resource code to register an internal function as an event handler for a form or field event.

The following sample demonstrates HTML Web Resource located in the Account form header area, ‘listening’ to the Account Name attribute change event. 
The code is located in the HTML Web Resource:

//register event handler to the account name attribute onChange event

function registerRefreshEvent()
{
    if(parent.Xrm.Page != null)
    {
         parent.Xrm.Page.data.entity.attributes.get(“name”).addOnChange(refreshContent);
    }
}

//do something with the Web Resource content…

function refreshContent()
{
    alert(“Refreshing Web Resource content…”);
}

registerRefreshEvent();

HTML Web Resource located in the Account form header area, ‘listening’ to the Account Name attribute change event